 MoonGit
Track and lock large files with Git LFS
Set up Git LFS, review tracking rules, and identify files locked by another collaborator.
Install and verify Git LFS
Install Git LFS and run git lfs version in PowerShell. Enable Git LFS tools in Settings → Advanced features if needed, then open Git LFS on the branch bar or under More tools. Check the remote and existing tracking rules.
Add or review a tracking rule
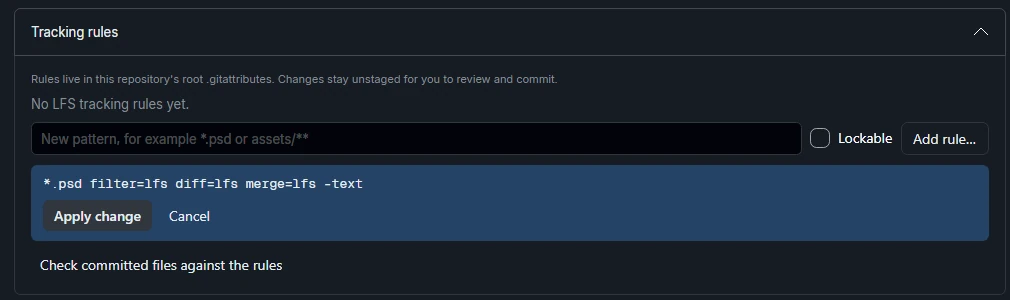
Expand Tracking rules, enter a pattern such as *.psd, and select Add rule…. Read the preview, select Apply change, and inspect the .gitattributes diff. It should contain a rule for that pattern. Stage it with the intended files and verify that the new files appear in the Git LFS tools. The rule affects content added under the pattern. Migrating past commits requires a separate history rewrite.

Coordinate file locks
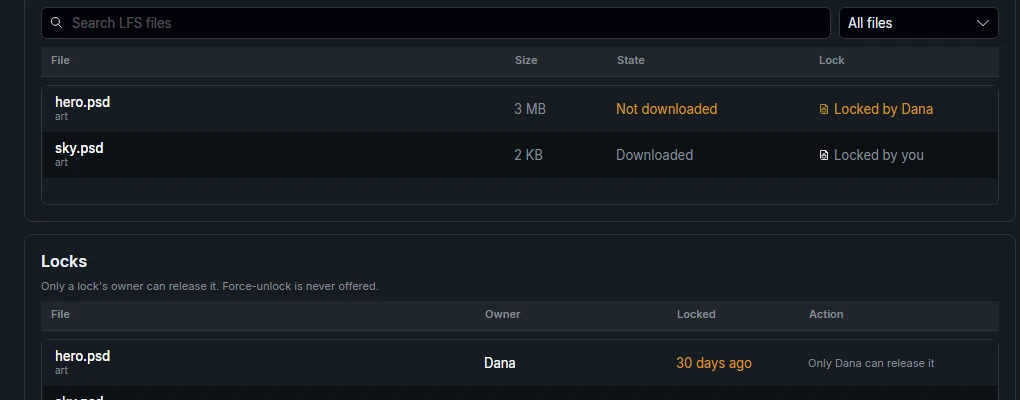
If the remote supports locks, inspect the list before editing a shared asset. Check whether the lock belongs to you or shows another owner. Use Lock selected when you intend to request a lock. Release your own lock when the file is ready for someone else. Coordinate with the listed owner before changing a file they locked.
Troubleshoot missing Git LFS · See Git and local tool compatibility